Lights
Now that we’ve set up our Circuit Playground Express, we can start coding for it. We’ll be using a language called python, more specifically circuitpython which is a flavor designed for use with electronics like our Circuit PlaygroundThe Circuit Playground has 10 LED’s on it called neopixels. An LED is a light emitting diode. These neopixels are actually small groups of LED’s to which we can give RGB values to set their color.
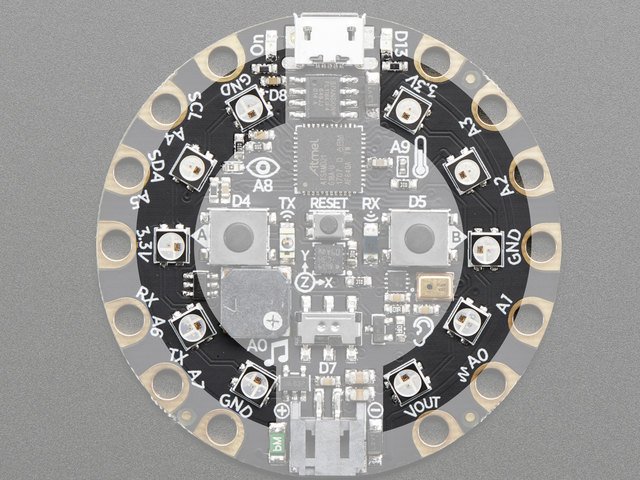
- from adafruit_circuitplayground.express import cpx gives us access to cpx (for Circuit Playground Express) which helps significantly simplify our code.
- cpx.pixels.fill((255,255,255)) gives us access to our (neo)pixels and fill allows us to give an RGB value to all the pixels at once. This is not dissimilar to how we can specify colors in Photoshop. Note the double parenthesis here, remember that we need this for fill. As we do more code we’ll understand why this is needed.
When you save (︎+S or CTRL + S), you’ll see the lights flash white, for but a brief instant. In order to make the lights stay on longer we’ll need to add a bit more code︎
- We use import time in order to have access to its functionality over...time. The import statements we’ve used so far are built into python, so we don’t actually need to download any new files.
- time.sleep()︎ let’s us stall for a fixed amount of time. The time between the parenthesis, 0.5 in this case, means that we will wait half a second.
- cpx.pixels.fill()︎ We’ve seen this already, the only thing here to know is that as we get closer to 0, each respective color will become dimmer, so cpx.pixels.fill((0,0,0)) will give us a fully dimmed set of neopixels.
Stop! And Play a Little Here!
Take some time now to play with different colors in fill(). Here are some examples to go for:- Change the fill() to purple, orange, light blue, red and green; try a bunch of different colors, or use a color picker to see how close they compare.
- Use multiple time.sleep() and fill() statements to go from red to blue, and back again.
Your code for number 2 might look, something like this:
If you wanted this to loop multiple times, let’s say 100 times, your first instinct, based on the fact this is the only code you know so far ︎ would be to just copy this code 100 times. However there’s an easier time to make this loop forever (we’ll get to specifically 100 times soon).
In order to get our code to loop continuously, we need what’s called a while statement.
while True: is our while statement. Everything that is indented (all our previous code) will execute, again and again as long as True is true. True will always be true, so our code will loop forever. Note that we removed the hold on the red value at the end of our code from before in order to make it a smoother transition back to the red at the beginning of our code.
True is what’s called a boolean value. It can only be True or False; 0 or 1. We’re about deal with more boolean values in our very next lesson. For now, all we need to know is that anything indented after while True: will loop continuously. Here are some exercises.
Exercises
- Use a combination of short and long flashes of light to create a looping morse code message.
- Look at our “red to blue to red,” attempt to make a version of this that is smoother. Experiment with using longer and shorter spaces between each different fill() and how much you change the value in the fill by. Programming is often about removing redundant code and making things less annoying. Eventually we’ll learn ways to do this with less code, take note of what is annoying and tedious about this process.
- Advanced If you’ve programmed before, you might not be familiar with the Circuit Playground Express-specific code, but you’re probably familiar with basic coding stuff. Either figure out specifically in python, or explain what coding concept you’d need in order to achieve something like this.
[video of pixels lighting in sequence]
The one thing you might need to know is that cpx.pixels[the pixel you want] = (RGB value) will allow you to write to a specific pixel. The first one is zero, so to make the first neopixel green you’d write cpx.pixels[0] = (0,255,0)