Fall 2021 ︎︎︎ SUNY Purchase ︎︎︎ (DES3090) Interactive & Experience Design
knitting Circle: PYthon + CPE pt.1, lights & ifs
Internal check-in
So first, check-in with yourself and see how you’re feeling. Are you nervous? Excited? Does doing anything that looks like algebra make you stressed out? Does the word “math” stress you out? Take a moment to see what’s happening and take note of how it changes. Whatever the case, the feeling is valid. Just take a sec to take a breath.What are we doing here?
All we’re doing is typing words. That’s it. If you’re getting frustrated, stressed, or see somebody else get something you do not, try to recenter yourself that you’re just typing words. You may just have to retype them (“refactor”), interrogate why they are not working (“debug”), or just make sure you’re updating the correct file.
Most of the words we’ll be typing are a programming language called Python. Specifically it is a version of Python called “CircuitPython” (check here for more about the CircuitPython project and devices that utilize it) which is designed with devices like the CPX in mind. The differences between Python and CircuitPython will probably not come up for us, but if we experience any, we’ll tackle them together.
A note for astute nerds
Note that you can program the CPX in different ways. One is with Circuit Python like we’re doing. Another is something called MakeCode that uses visual blocks and javascript, another is with Arduino which uses C++. You may see examples with these different options; if you want to talk about how to translate them or if they are doing something that you cannot do with CircuitPython happy to do that.My reasons for selecting Python
(if you care, nbd if you don’t)If you’ve taken New Directions in Virtual Space or Programming for Visual Artists in New Media you have experienced programming in C# or Javascript (note this is not the same as Java, for reasons that are quite dumb) respectively. Unity is a popular program and Javascript is totally a viable language worth learning but I like Python for several reasons that you may or may not be curious about.
- Python is good for beginning programmers. It doesn’t use semicolons to indicate the end of lines (which many people forget and then get frustrated about) and it forces you to indent your code in a way that will make it much easier to read. It also doesn’t use something called “datayping” which many people find confusing when they initially learn programming.
- Python is relevant in design. If you end up doing coding in Glyphs or Robofont, they both use Python. A good next step for making type-based animations is a program called Drawbot, which uses Python.
- Even if you don’t end up using Python, you’ll be set up for learning another language effectively. If you learn something more hardcore like C or C++, Javascript, expressions in AfterEffects (this or PHP, all of those are basically “kinda like Python but with a couple of different rules” so you’ll be in a good place to learn those.
Where to look things up
Some of the things we’ll be coding are specific to the CPX. For example the code the parts that read “cp.button_a” as you can imagine, were made to specifically work with the CPX. If you’re looking for how to do things in Python, look on websites like w3schools. This is the documentation for the “API” (Application Programming Interface) or code specific to the Circuit Python Express.
While that reference is exhaustive, I would recommend looking through examples I linked in the intial part and then looking for the relevant example (the files should be carefully labelled for playing back soundfiles, playing tones, using the IR sensors, accelerometer, etc.)
Comments (and why they are important)
Code (Python, assembly, C, whatever) is for machines. A programming language may be made to be easier to read or contain elements that sound like human speech, but they are not in fact human speech. In order to facilitate this process for human beings, there are something called comments. You can use them to describe what your entire code is doing, what a given group of lines is doing or to visually separate elements. Below is the basic red blinky LED example you uploaded to your CPX last week to make sure it works with comments added.︎︎︎Gettin’ Loopy
All the code from our red blinky example is turn a light on, wait (because the CPX can process things very fast), turn a light off, wait, and then start over. To start over we create a loop. Any “animation” you will have to do in code will have some kind of a loop. To do this we create what is called a “while loop” A while statement says “while a condition is true, do everything in the indented portion.” In this case we say while “True” is true we will loop. So therefore, True will always be true, and thus, this code will loop forever. Python relies on indenting to distinguish what is part of the while loop. Everything after the colon that is indented will loop forever. Try to see what happens if you take our basic LED blinking example and un-indent a part of it. How does the “blinky light” example work?
So knowing about True, we have an insight as to how the LED blinky example works. If you set “cp.red_led = True” it will be on, and then if “cp.red_led = False” it will be off. Note that you must type things exactly correctly; False and True must be capitalized. The nerd terminology for what we are doing is called “setting the value of a parameter” cp.red_led is a parameter and True or False is the value.“time” which we imported uses something slightly different. the statement “time.sleep(0.5)” does what is called “calling a function” the function being called sleep. That function has one parameter it is designed to accept, and that is, how long to sleep for (in seconds).
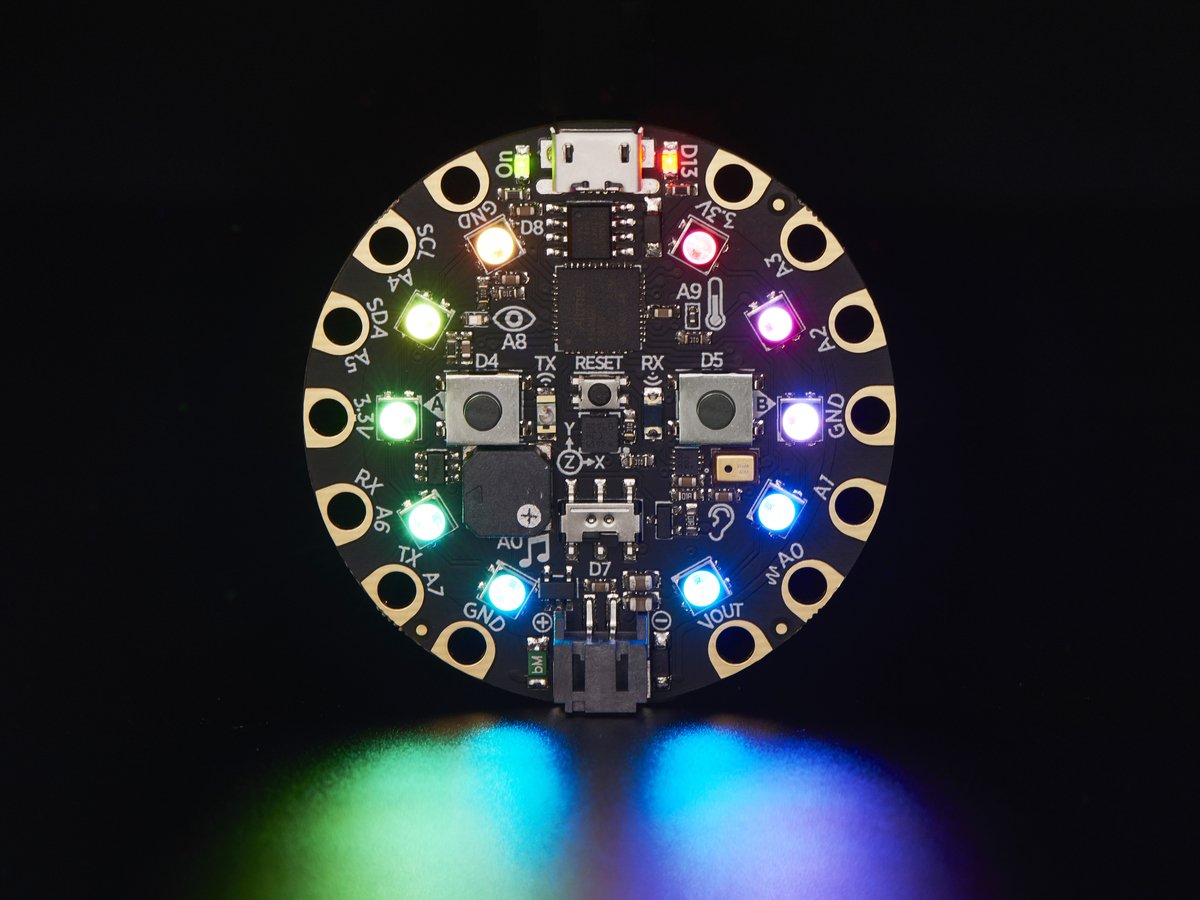
Talking to neopixels
So we’ve done the LED thing but we want to play with the cool LEDs in a circle on the CPX. These are called “neopixels” and they can display ranges of RGB light values from 0 - 255. To turn on all the pixels to a specific color we use the fill function (see below) and then set a three parameters for red, green, and blue respectively. Note that there are two parentheses around the fill. The idea here is that we are calling the fil() function and the RGB value in parthesis is what is called a “tuple” this is a way to set multiple values at once.︎︎︎More nuanced convos (talking to one neopixel at time)
To talk to one neopixel at a time we have to change our syntax slightly. We address each one and set its color like this by number like this: cp.pixels[the number of the pixel we want to access] = (the color we want to set). So to talk to the 7th neopixel to blue we’d do: cp.pixels[6] = (0, 0, 255). We type 6 because the first pixel is 0 not one.Here’s an example addressing some of the pixels individually. Play with this for a bit. ︎︎︎
Okay so you may think that this gives us greater control, but it is a little bit more...fiddly to change the color of one neopixel. If you wanted to do something like...turn on each neopixel in order, you’d have to do something like this. ︎︎︎
If you can imagine there are a lot of opportunities for error here. Even if you copy paste things, if you want to change things later that seems like a quite...annoying task. If you want to do the above example a bit more dynamically you’d use what is called a “for loop.” While our “while loop”goes on forever or...almost forever. A for loop is design to accomplish a certain, usually smaller task repeatedly.
So here’s an example where we take “p” (this can be anything, but we are using simply the letter “p” because it is quicker to type and we want to use it for the number of the neopixel; hence p) and going from 0, 10 (we’ll come back to that in a second). Each time we go through the code we define after the colon, increase the value of “p” check if it has passed our maximum value, and if it has not, go through our code again. So this code will go to the designated neopixel, turn it on, wait, turn it off, wait then go to the next neopixel. Look at this code, copy it and try to a couple things. For example try to go from neopixel 1 - 4, then try neopixels 7 - 9. Then try something like turn on neopixels 0 - 4 blue, neopixel 5 green, and neopixel 6 - 9 red. ︎︎︎
Buttonin’ up
Okay so, turning lights on and off is cute but we gotta interact no? There are two buttons and a sliding switch on the CPX which we can check the state of using True or False values, True will be pressed and False will be released. For the sliding switch True will be right and False will be left if the USB connector is on the bottom.To check whether a button is pressed or released we use what is called an “if statement” and if statement is basically as the name implies, it checks if a condition is happening (or not).
Here’s code for the button to turn on the neopixels. Note that button B is accessed with cp.button_b︎︎︎
You may notice the light doesn’t turn off when you let go. To check whether the button is off, we use the else statement. This works largerly like it sounds “if the button is pressed, turn on the light, otherwise, turn off the light”, here’s how it looks︎︎︎
Variables
A variable is a way of setting a value that we will use later. When we use “p” in our for loop before, that is an example of a variable. We can create variables of our own at any time. You might create a specific value for a color you might want to reuse ie: my_cool_color = (249, 127, 40) or Most of the time that you will use them they’ll be like an “options menu” in a video game. Something you can set outside of our main loop. This way you could use the same color multiple times for example without having to re-type it. You can also adjust it later︎︎︎
Challenges
- Make it so the neopixels turn on and off in a looping sequence (any color, either direction) The answer if you want to look︎
- Make it so the neopixels “glow” (go from off to a specific color, then off again) I’d suggest starting with some combination of R, G, or B, like (255, 0, 0))
The answer if you want to look︎ - Make it so button A turns on one half of the neopixels, button B does the other half, and A and B will turn on both halves.
The answer if you want to look︎