CUNY Queens ︎ (ARTS241) Design 1
Knitting circle:
Knitting circle:
The Basics of
After Effects
What is After Effects?
How I think about After Effects is basically Photoshop/Illustrator + Time. You can do a lot of the same things you do in those programs (oftentimes in almost identical ways), but with the factor of time added. This makes some things more complicated, or rather, just adds a lot of stuff to the screen. Thus we’ll look at, on a basic level, how to start manipulating that stuff, and how to make it do the things we want.To manage how a setting on a parameter changes over time, After Effects uses what are called keyframes, basically one parameter will have one value at one keyframe, and another value at the next keyframe. After Effects will figure out how to transition between keyframes. You can also finely control how to change the transition or interpolation between keyframes.
I’ll do you one better, why is After Effects?
After Effects is usually used for creating what are called motion graphics(these are graphics in motion ︎)
and full-fledged cartoons & character-based animations (with the help of other tools and programs like Flash/Animate and Photoshop), as in, straight up the stuff you see on TV.
Workflow
Workflow is the term professional designers and makers of things use for “how to do stuff.” The basic workflow of After Effects is:- import content (that you’ve created with animation in mind)
- put that content into something called a composition
- change the properties of that composition over time via keyframes
- more than likely link that composition with other compositions...in one big composition
As you do this you’ll preview your work to make sure it looks good, and finally render it out. This will cause your AE work to actually become a video that people can look at, and hopefully enjoy.
What is all this shtuff I’m lookin’ at?
So you’re listening to me talk and you opened up After Effects, it finally loaded and there’s a lot of stuff. Here’s what you are probably greeted with and what this stuff is.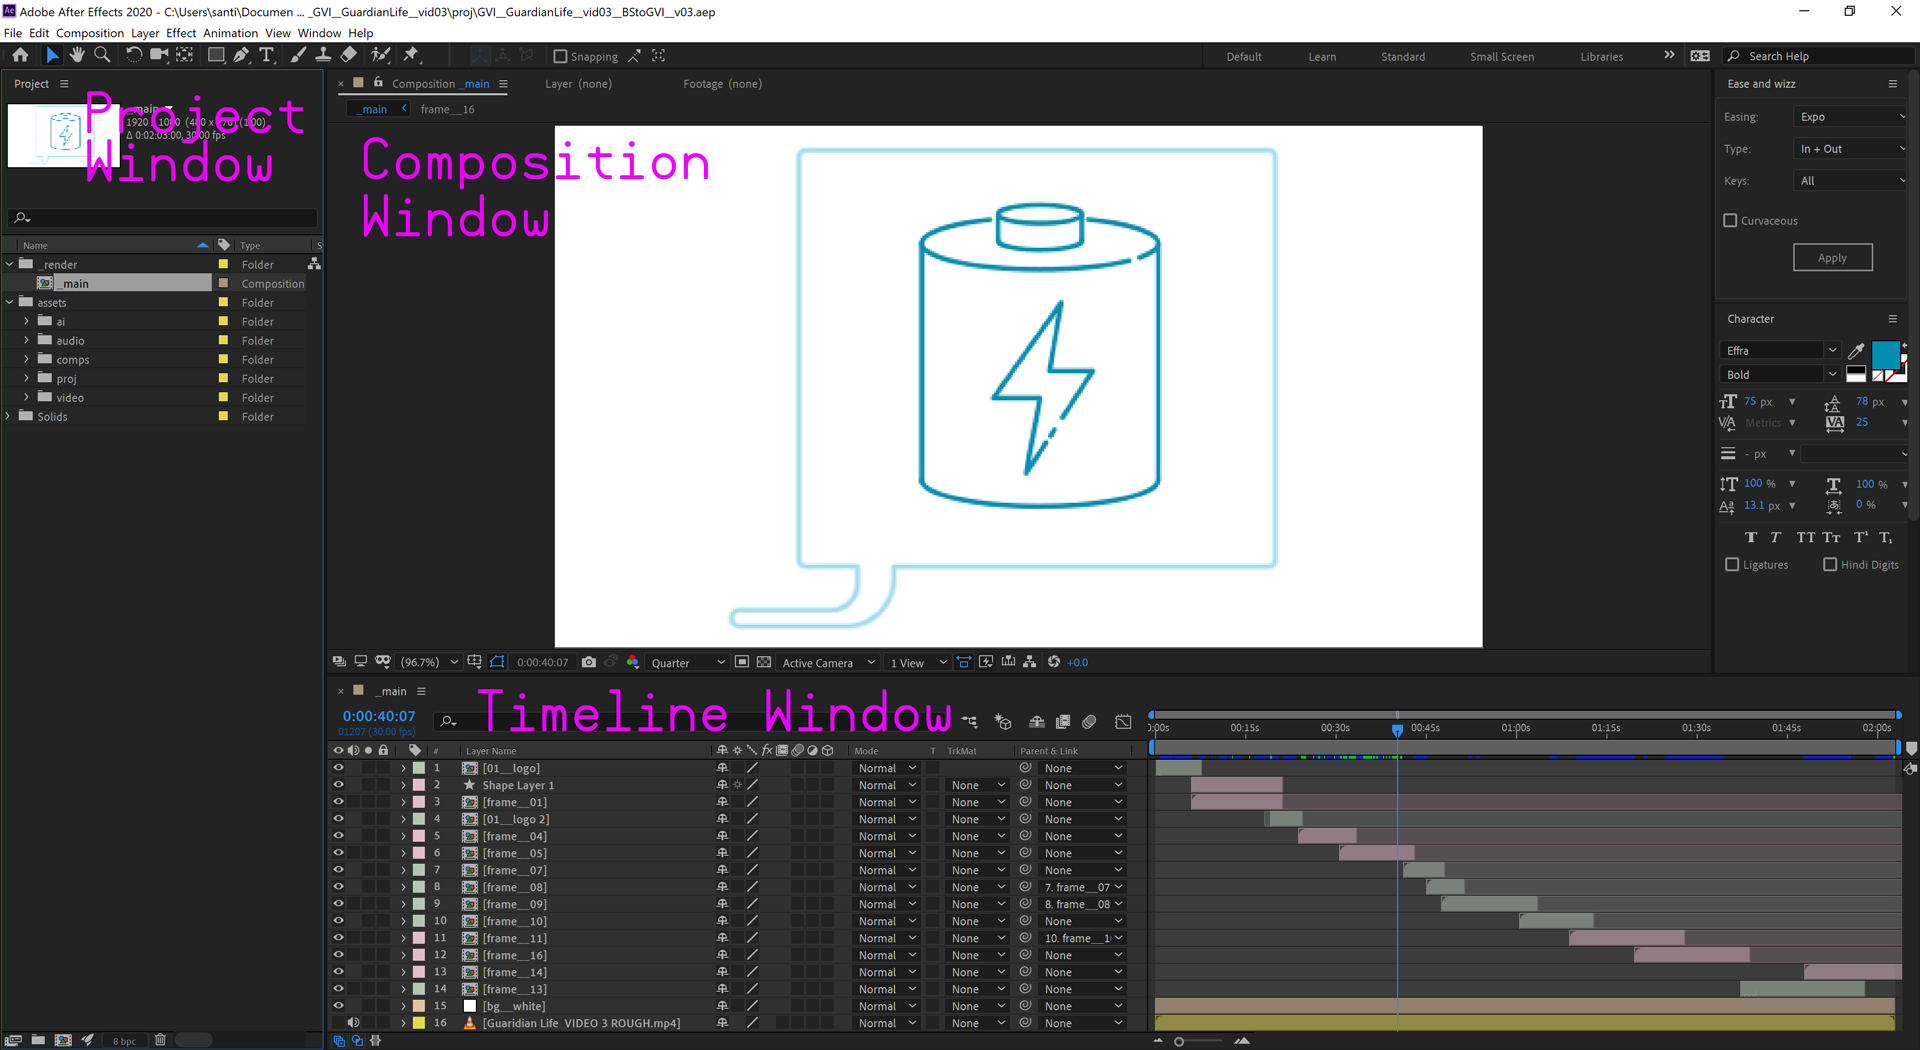
Composition Window
The Composition Window is where you see a preview of what your work will actually look like. You can zoom in and out, change transparency, as well as change the quality (lower quality so you can see a preview faster is typically what you’ll be doing). Project Window
The Project Window is where...your project lives. To be more precise, this is where the files you import and can use in compositions go, as well as other things specific to After Effects like compositions and solids. Make sure to use folders to keep this organized, and organize your actual files in such a way that will reflect, somewhat, on what you’ve done here. Note that these are separate from the actual folders and files on your computer.Keepin’ things organized
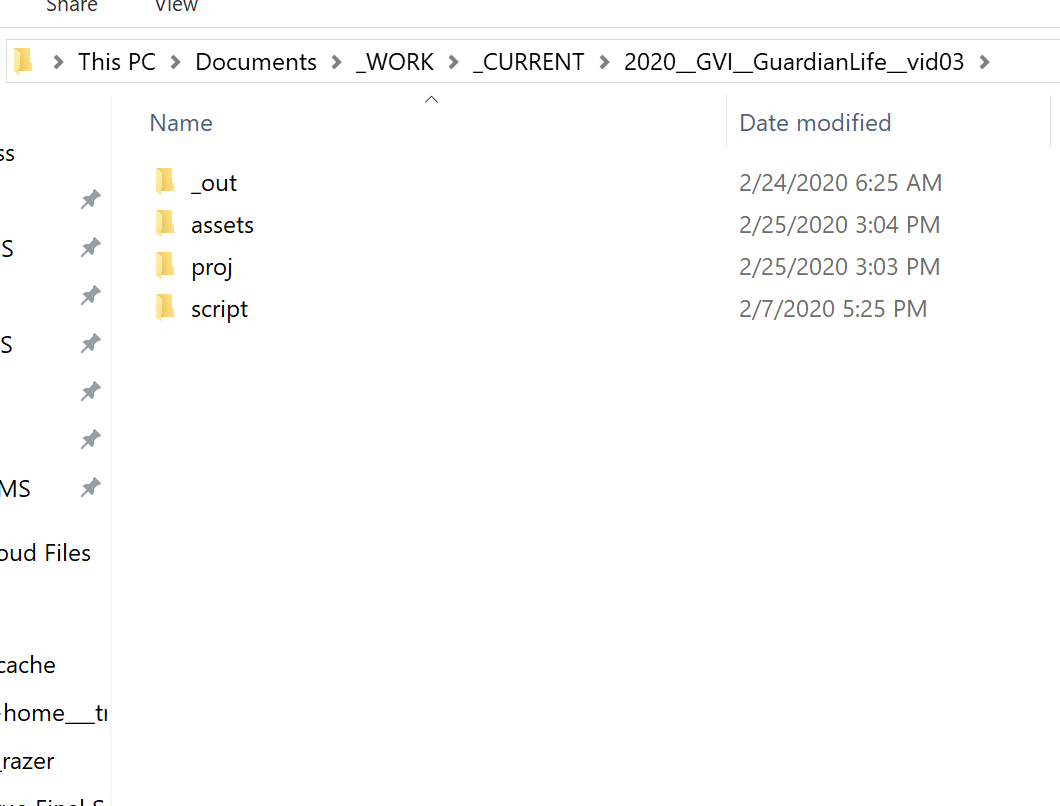
I organize my files and Project Window to be similar. This is what they typically look like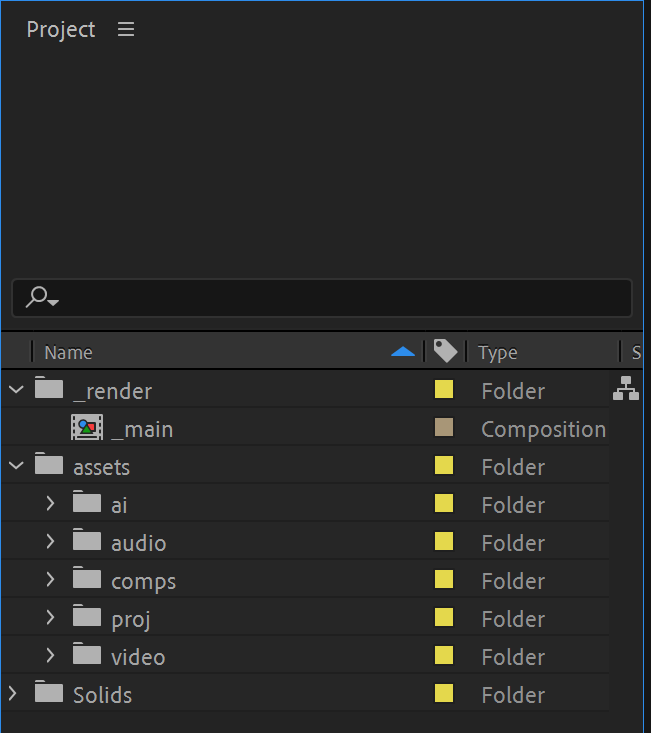
-
_out is where any renders go, this is usually what I am rendering from the folder I call _render in the After Effects project.
- assets is...all my assets or things that will go into my compositions. I have subfolders in here for img (jpg, png, etc), .psd files, and .ai files.
- proj is where projects live. Typically these will be Premiere Projects or After Effects projects.
Creating a Composition
Here are two main ways to create a composition:-
On the menu up top go to Composition︎New Composition (︎ or CTRL + N). You’ll be prompted with a menu where you name the composition, set the size, framerate and length (in time). It should look something like this:
![]()
If you want to adjust your composition settings later go to Composition︎Composition settings (︎ or CTRL + K).
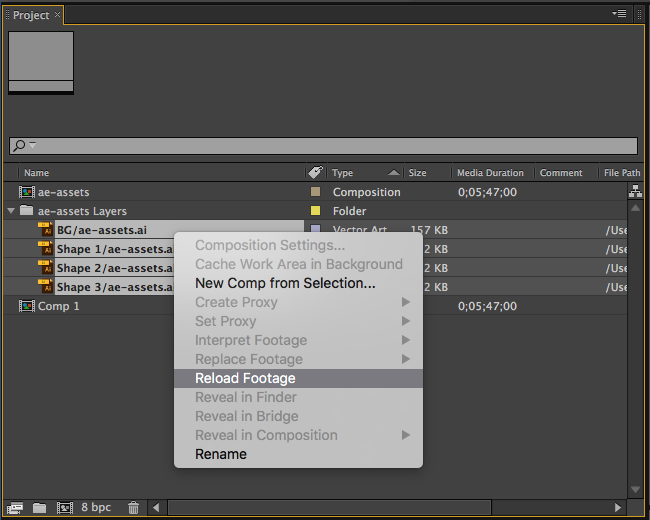
- Right click on an imported file in the Project Window and select “New Comp from Selection”
![]()

Timeline Window
This is where we we’ll be doing most of our work. Your composition has layers. Those layers can be “twirled down” to reveal more properties which you can create keyframes for. There are also a bunch of switches and labels which you can change for each. Some of these may be hidden from view. Some are familiar like Blending Modes from Photoshop, while others more arcane now like parents and track mattes This shows a reflection of our composition as layers and properties. As we change and manipulate these layers they’ll be reflected in the preview of our Composition.Keyframes
Adobe’s Help page on Keyframes for After Effects︎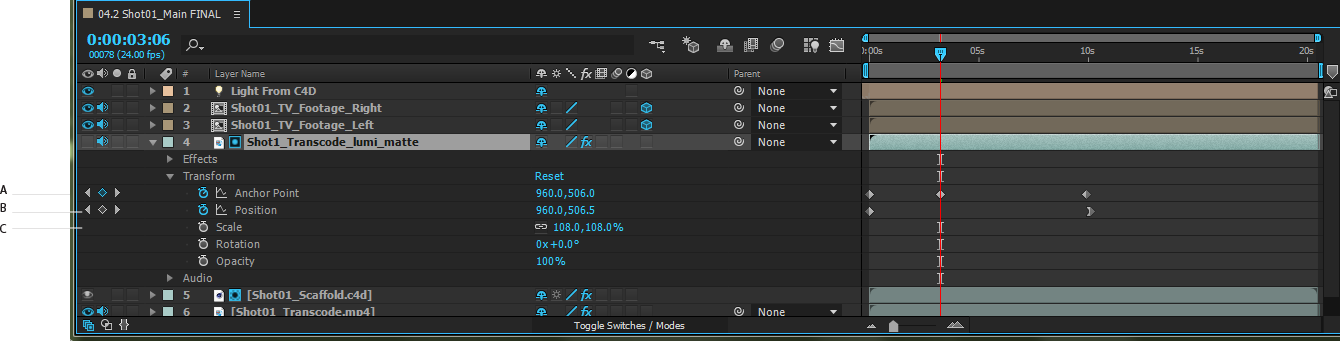 Layers “twirled up” versus “twirled down”


-
move the indicator to any point in time
-
“twirl down” a given layer
-
click the icon that looks like a stopwatch to create a keyframe
-
then move to a new time, and click the diamond sthape on the left and then change the property. (Alternatively you can just start changing the property to automatically create a keyframe).
Work Area
Adobe’s Help page on Previewing and the Work Area︎

The Work Area is the specific portion of the timeline we want to work with. Dragging the blue handles (circled above) will change the preview area. Alternatively, you can go to a specific time, and then press B to set the Beginning of the work area and N to set the eNd of the work area.
Keyboard Shortcut Cheat Sheet
(Here’s a link to a comprehensive list of After Effects Keyboard Shortcuts.You may also find an inumerable number of “Top 10 INSANE After Effects Keyboard Shorcuts you MUST know!” out there. These are, to my mind, the best to help accelerate your workflow)I highly recommend getting familiar with the keyboard shortcuts in After Effects. There’s a lot of stuff going on and knowing the shortcuts will just speed up your work.
Spacebar︎Preview current Work AreaCTRL/︎+K︎Edit current composition settingsJ︎Go to previous visible keyframeK︎Go to next visible keyframeB︎Set beginning of Work Area to current timeN︎Set end of Work Area to current time[︎Move currently selected layer’s in point to current time]︎Move currently selected layer’s out point to current timeALT/Option+[︎Set currently selected layer’s in point to current timeALT/Option+]︎Set currently selected layers out point to current timeT︎View the Opacity keyframes for currently selected layer(s),
(I think of this as “T for Transparency” eventhough the property is called Opacity)P︎View the Position keyframes for currently selected layer(s)S︎View the Scale keyframes for currently selected layer(s)A︎View the Anchor Point keyframes for currently selected layer(s)R︎View Rotation keyframes for currently selected layer(s)CTRL/︎+ Click the current layer︎Reveal ALL keyframes for clicked layer (This is useful for when we get into Shape Layers and a layer may have a lot of properties)CTRL/︎+D︎Duplicate the currently selected layers (This is different than copying a layer with CTRL/CMD + C and CTRL/CMD + V It will duplicate ALL the properties of a layer like Parent status or Track Mattes)
Videos you can pause and stuff, if you want.
Other topics you may want to know about
Easy Ease, is a quick way to make movement look more dynamic/organic. If you want even more control I would recommend Ease and Wizz (a free-ish plugin)Precomposition is a simple little function that allows you to take multiple layers and convert them into a new composition.
Track Mattes are incredibly useful for the things that maks cannot do. They are similar to Clipping Masks in Illustrator
Parenting, is extremely useful. You can use it very simply to make two layers move simultaneously. Alternatively it is the basis for creating dynamic characters and for simulating simple machinery.
The Motion Tile effect is useful for creating patterns and transitions
︎Back to Design 1