CUNY Queens ︎(Arts241) Design 1
Knitting Circle:
Video Compression
Video compression is how you turn your After Effects projects into actual videos. To be 1,000,000% clear, you cannot submit .aep project files, you have to submit the actual videos for homework.
Even though you can create presets, you should understand the principles in case you are on a new computer or at a studio, or whathaveyou.
How to start the process
After Effects creates create what are called compositions (we will learn more abou those later). You simply select the composition you want to export and then press CTRL + ALT + M (Windows) or CMD + CTRL + M (Mac) or use the menus Composition ︎Add to Adobe Media Encoder Queue. This will launch Adobe Media Encoder (you may have to wait a sec), which is where you’ll do you’re encoding, or creation of video files from the stuff of your project files. You should see the name of the composition pop up in media encoder. 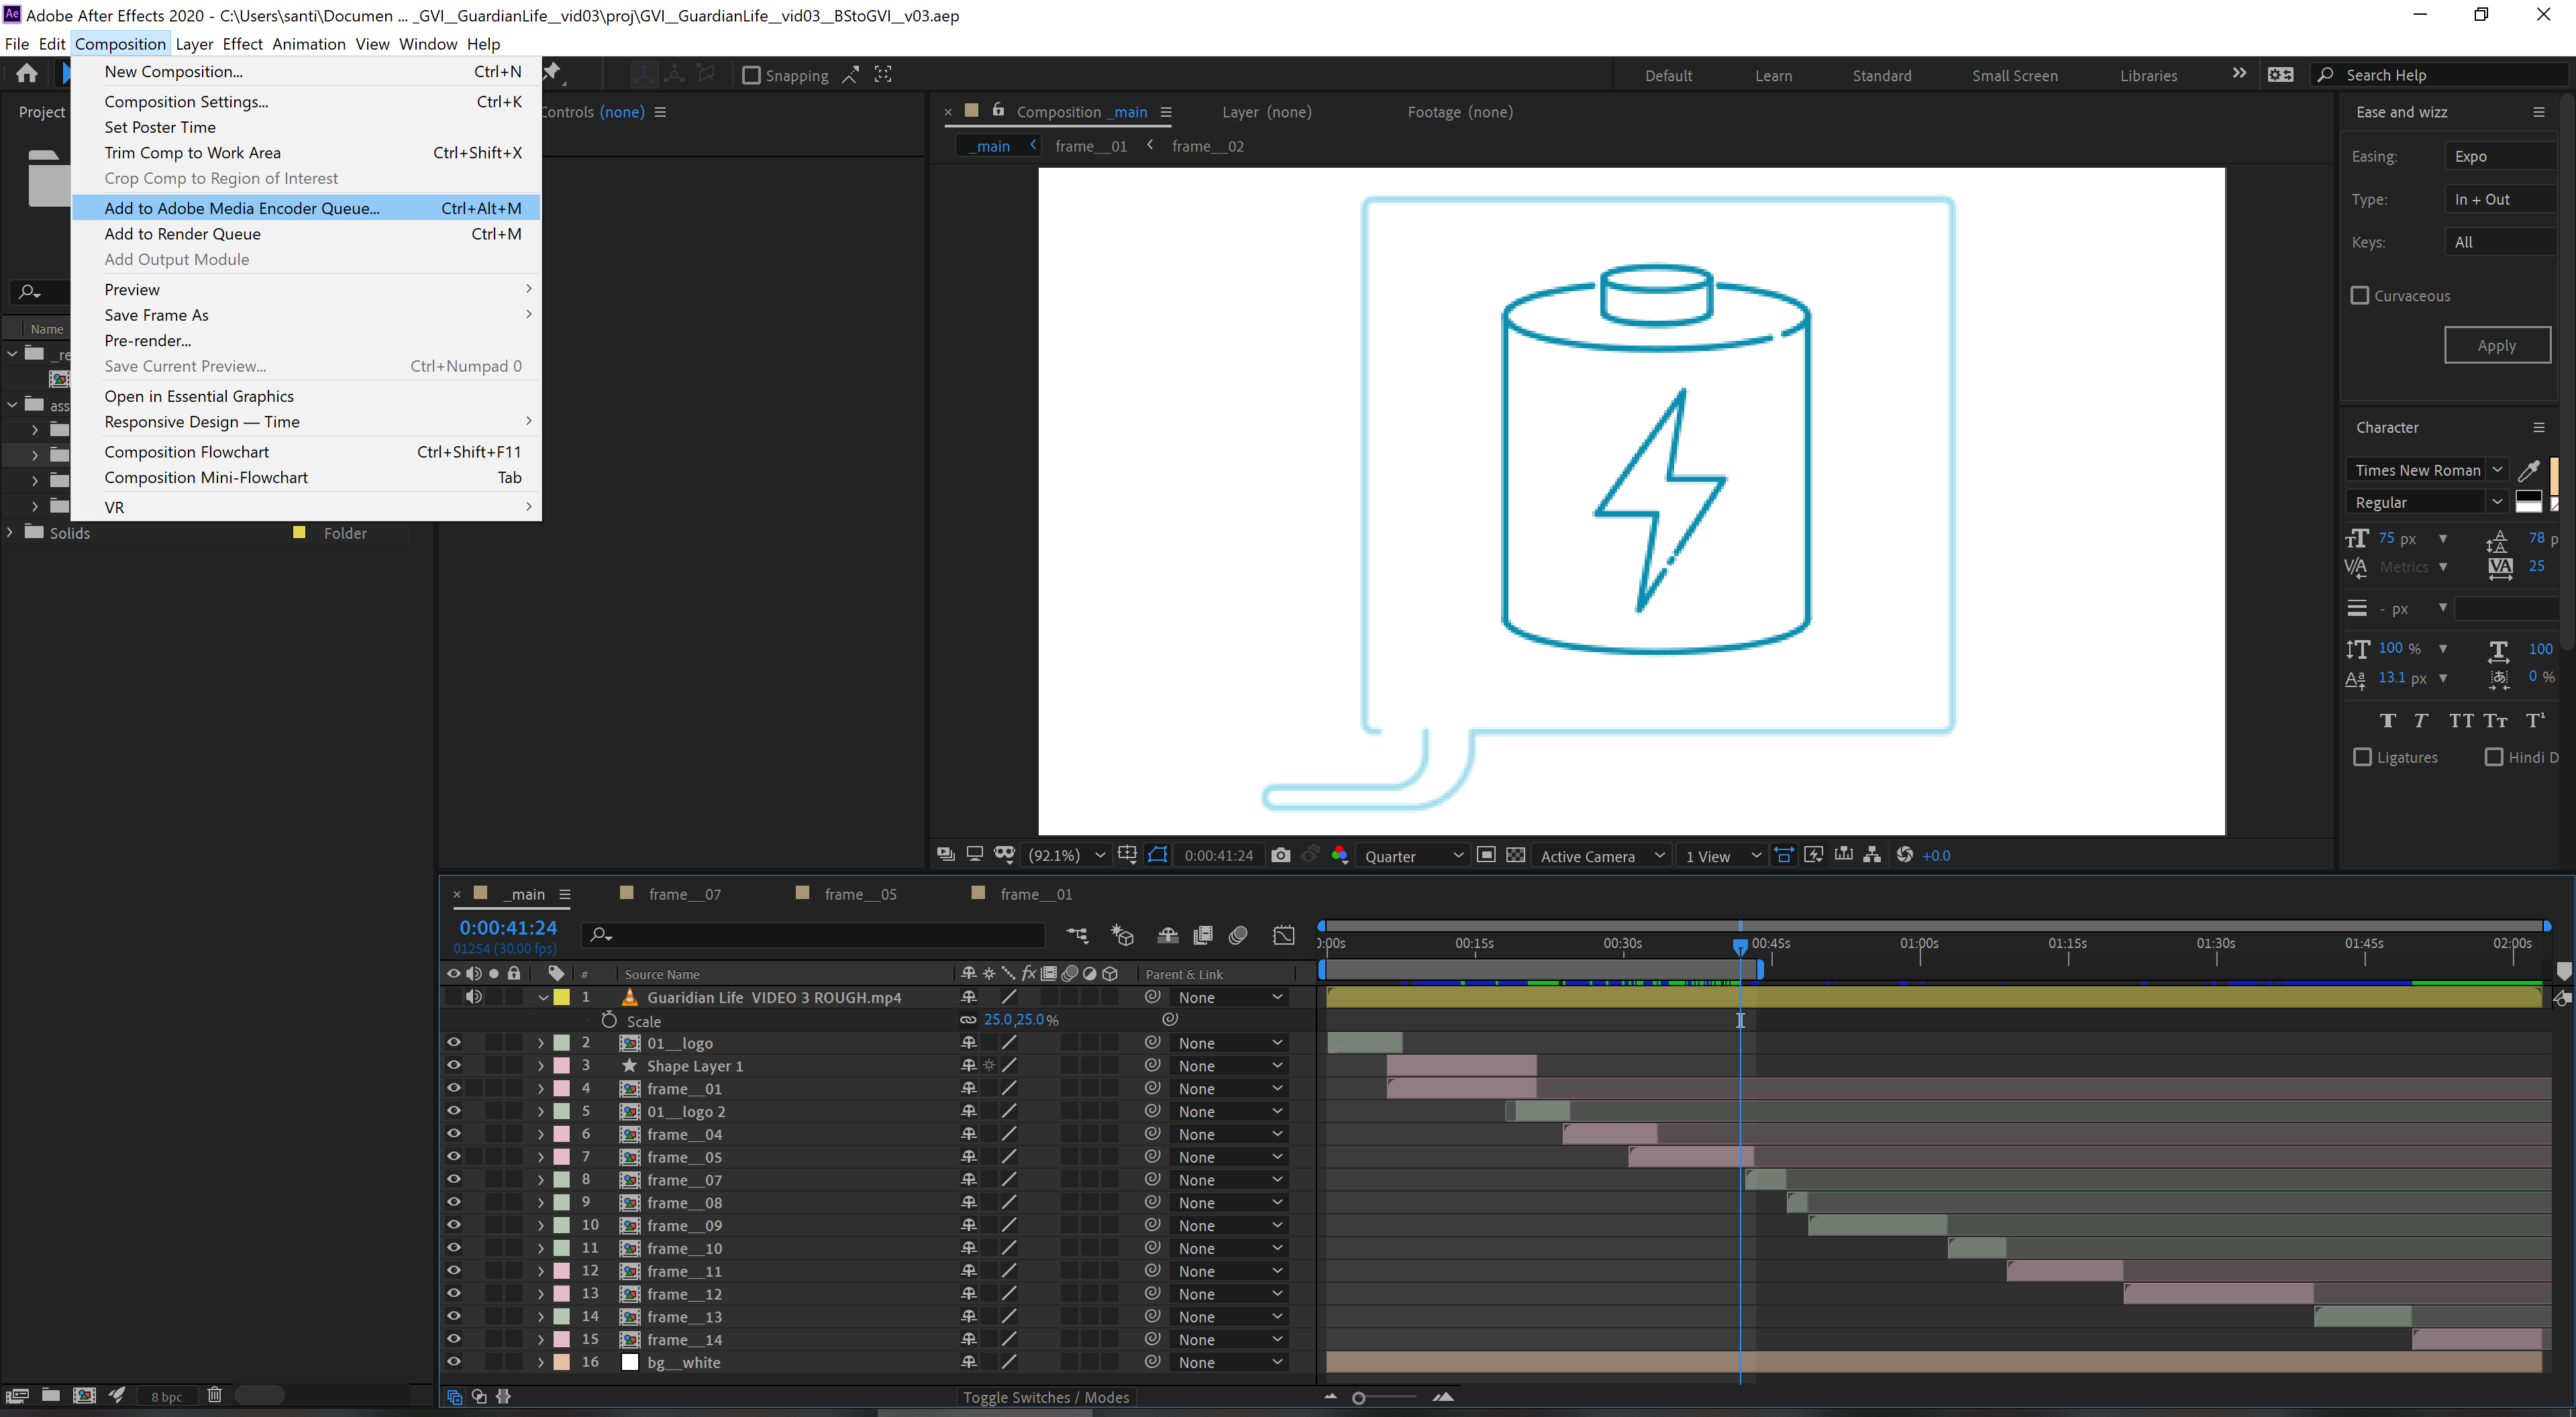
Just worry about these settings
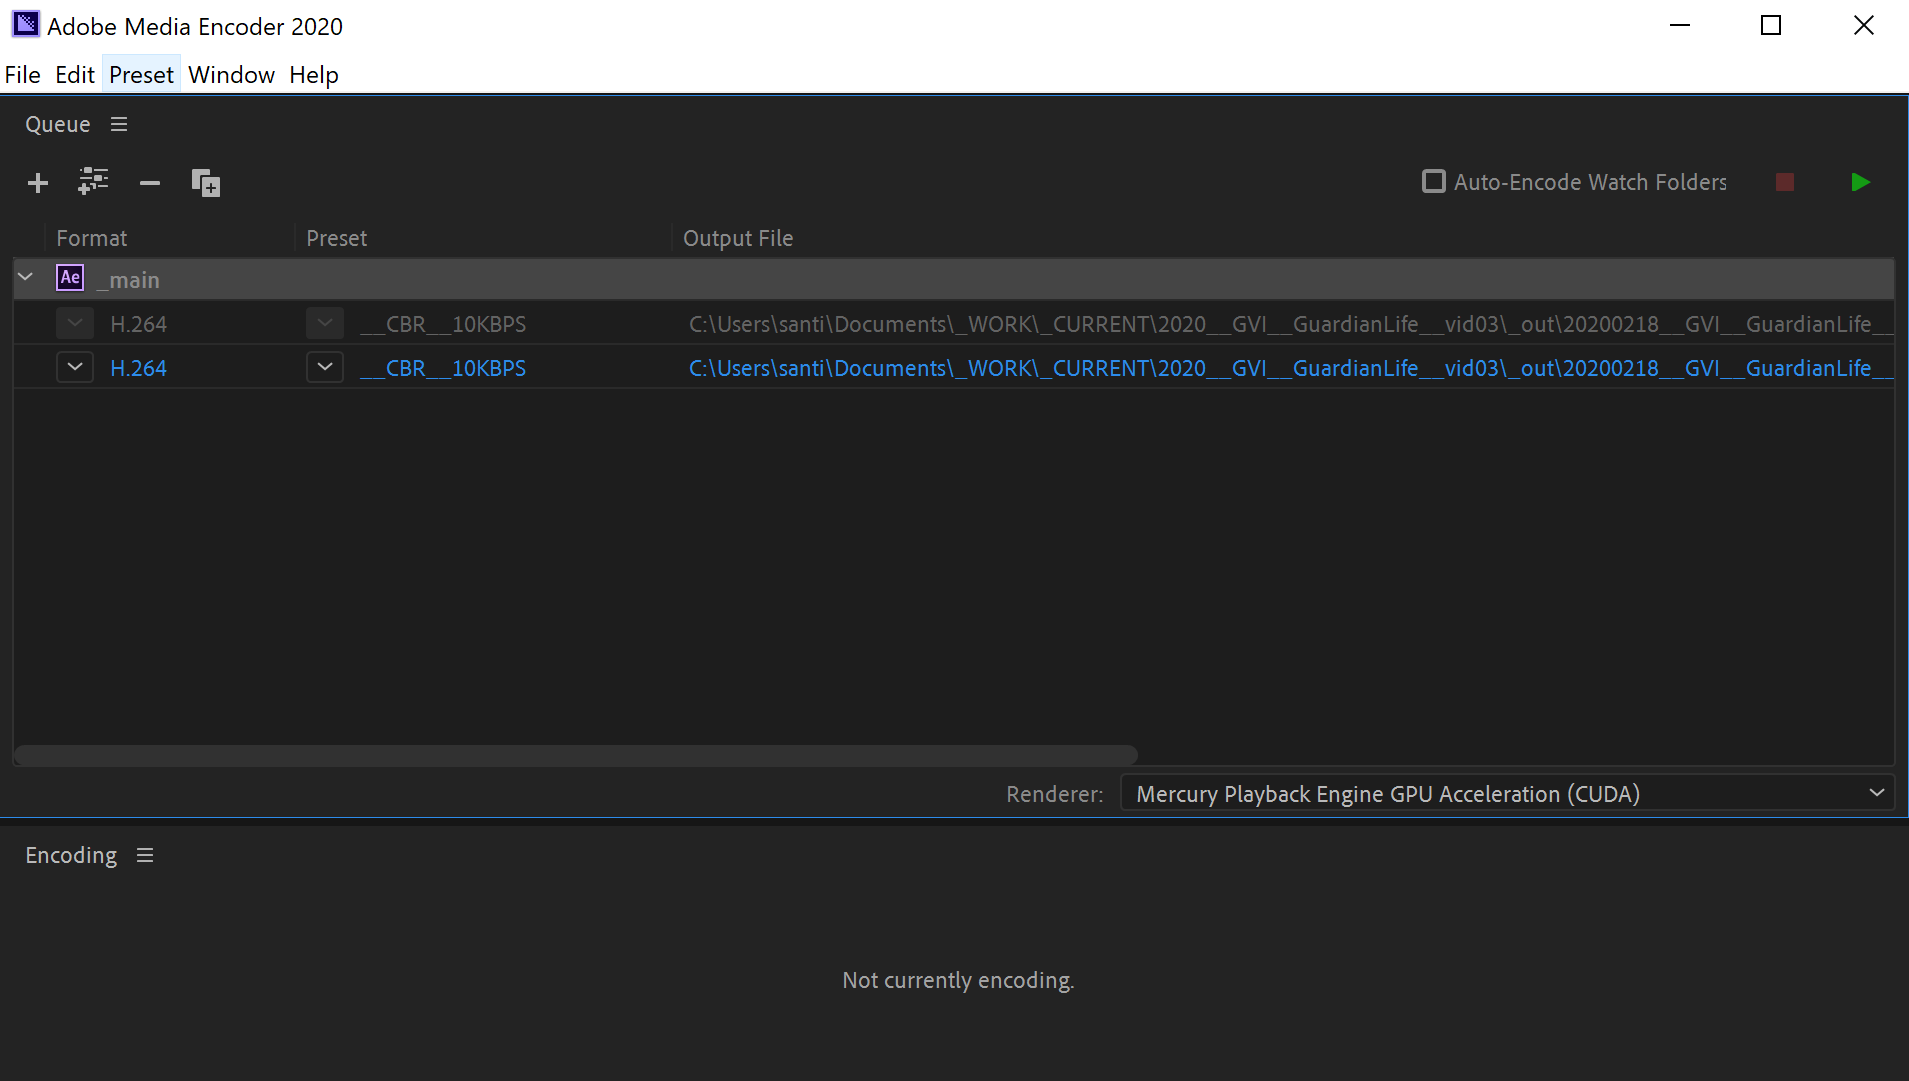
For the leftmost column (Format) make sure it is set to H.264, then click on either of the first two columns (the “links”) to change the actual settings. 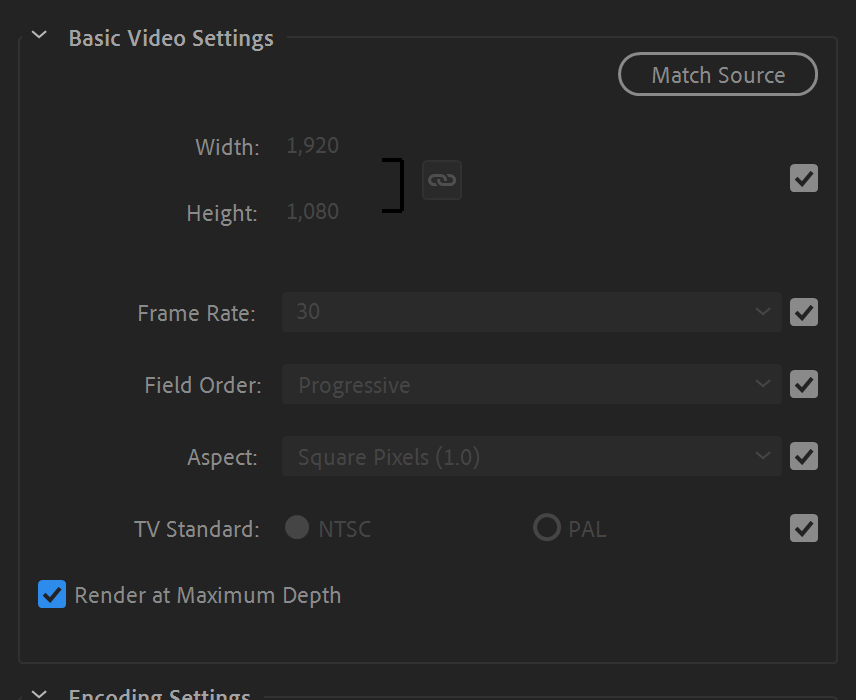
For the basic video settings, we’ll just use “Match Source,” you should have given some thought to these settings if they matter, but for most intents and purposes and for this assignment, do the following:
(note the parenthetical information is extra if your interested, and for context. You’ll probably never need to change them, but if you mess them up for whatever reason, it will be important)
- Width & Height︎1920px by 1080px (These dimensions are the standard known as “1080p”, if you click the gear on a YouTube video, you’ll see a number of resolutions, 1080p is usually the highest, though some people may go as high as 4K if they have the camera that shoots at that resolution. The aspect ratio, or the relationship between the width and height is 16:9)
- Framerate︎30fps (frames per second) (If this is totally alien to you, this just means that we need to show many still pictures a second to simulate motion. This will be fine for most situations. You may be creating motion graphics on top of video game footage that is at 60fps, so you might consider that if you need. You will also encounter other framerates if you work with video footage. 29.97 is fairly common with video. If you are working with footage from television you might see 24fps video)
- Field Order︎Progressive This is largely irrelevant today, but some older video cameras and standards utilized what is called “interlacing” where 2 frames are displayed at once. Field order is thus, which frame gets displayed first. When frozen or incorrectly compressed you’ll see a “combing effect.” If you need this (say rendering for a standard definition DVD or maybe for a television broadcast?), the person who needs it will let you know clearly. The opposite of “interlaced” is progressive, which you’ll almost always use.
- Pixel Aspect Ratio︎Square Pixels (1.0) This will almost always be Square Pixels. Fun fact, pixels is actually a portmanteau of “pix” and “el” or, picture element. Pixels have no fixed size. This includes their aspect ratio or squareness. Because we are creating video for screens, we’ll almost always, like...99.999999999% of the time be working with square pixels. The times this comes into question is with systems that made use of cathode ray tube. So if you’re creating graphics for a Super Nintendo, this might be important ︎.
- TV Standard︎NTSC This is another relic of old television. The standard for most of the world is NTSC (North America and Japan). However, Europe uses PAL. This is only important for broadcast video on old cathode ray tube (CRT) televisions, so we can be unconcerned with this.
- Make sure render at maximum depth is checked.
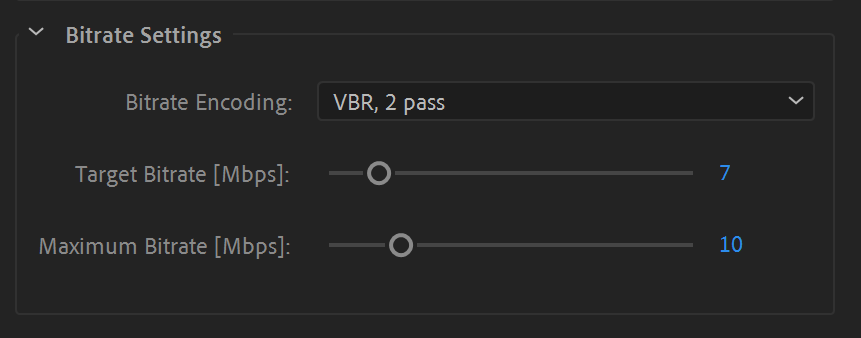
The main thing you want to change after all this stuff is the bitrate settings. This is, as the name implies, the rate of bits present in the video. In other words, that’s how much data (bits) will be passing through the computer to produce a given amount of video. It is measured in Mbps or megabits per second. The bitrate encoding is also important:
- CBR is constant bitrate.︎This will generally encode videos faster, but the filesizes will be bigger.
![]()
- VBR is variable bitrate.︎It will encode slower, however you’ll generally create smaller filesizes. As you increase from 1 to 2 “passes” it will increase the amount of time, and also the “intelligence” with which the video compresses. The video will be analyzed a second time to create a more effective compression. When you select “2 pass” you’ll get a target bitrate and a maximum bitrate. I generally
![]()

Based on the final destination your video will live, you may need different video settings. Most websites have recommendations for video compression settings. For example, here are the heavy hitters.
Audio ![]()
Audio is less important, though probably becomes more noticable as you do a longer videos. 48Khz Samplerate and 320Kbps Bitrate is probably higher quality than some of the audio you’ll be working with or “acquiring”. Either format is fine.
Creating a preset
Creating a preset is generally good if you know you need a specific group of settings for a particular video or series, and if you don’t want to go through all the settings everytime. It’s super simple, just set all your settings, and then click the button below and give your preset a good name.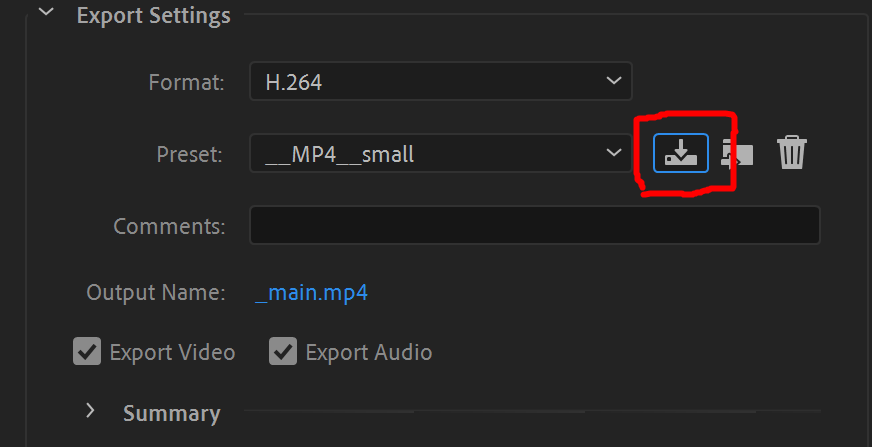
Tweaking and compression problems
Because of time constraints, you may attempt to render at lower quality. I recommend if you’re absolutely strapped for time, or are having problems with your machine, to simply render at a lower resolution, like 1280px by 720px (720p). That being said, as you compress more aggressively, you’ll see some more artifacts. This is a pretty old sample but you can see the “bad stuff” pretty clearly. While you probably won’t get results as bad as the later examples, you may notice some “smeariness” or you’ll see some “banding” in gradients. 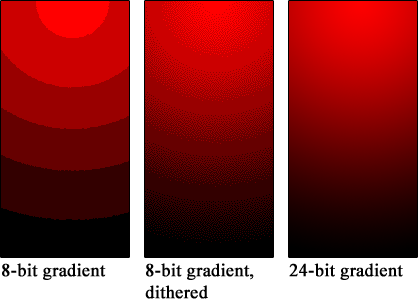
︎Back to Design 1