Spring 2023 ︎︎︎Purchase College, SUNY
︎︎︎
(DES2460)DMD2
Knitting Circle:
into the lens
(AE pt.4)Background
This will be our introduction to 3D in After Effects, this may be something that will help you for your Motion Story Project, and in general is something that looks impressive if done tastefully. That being said it can be a little bit confusing to set up; so please follow along. What (and why) is parallax?
Camera Camera (in After Effects)
Cameras in After Effects are incredibly powerful as tools but are also somewhat processor intensive, and should be handled carefully and intentionally. I recommend having a plan in advance with what your shot is going to be when using cameras. To create a camera we simply go to Layer ︎︎︎ New ︎︎︎ Camera or right click in your composition and select New ︎︎︎ Camera.

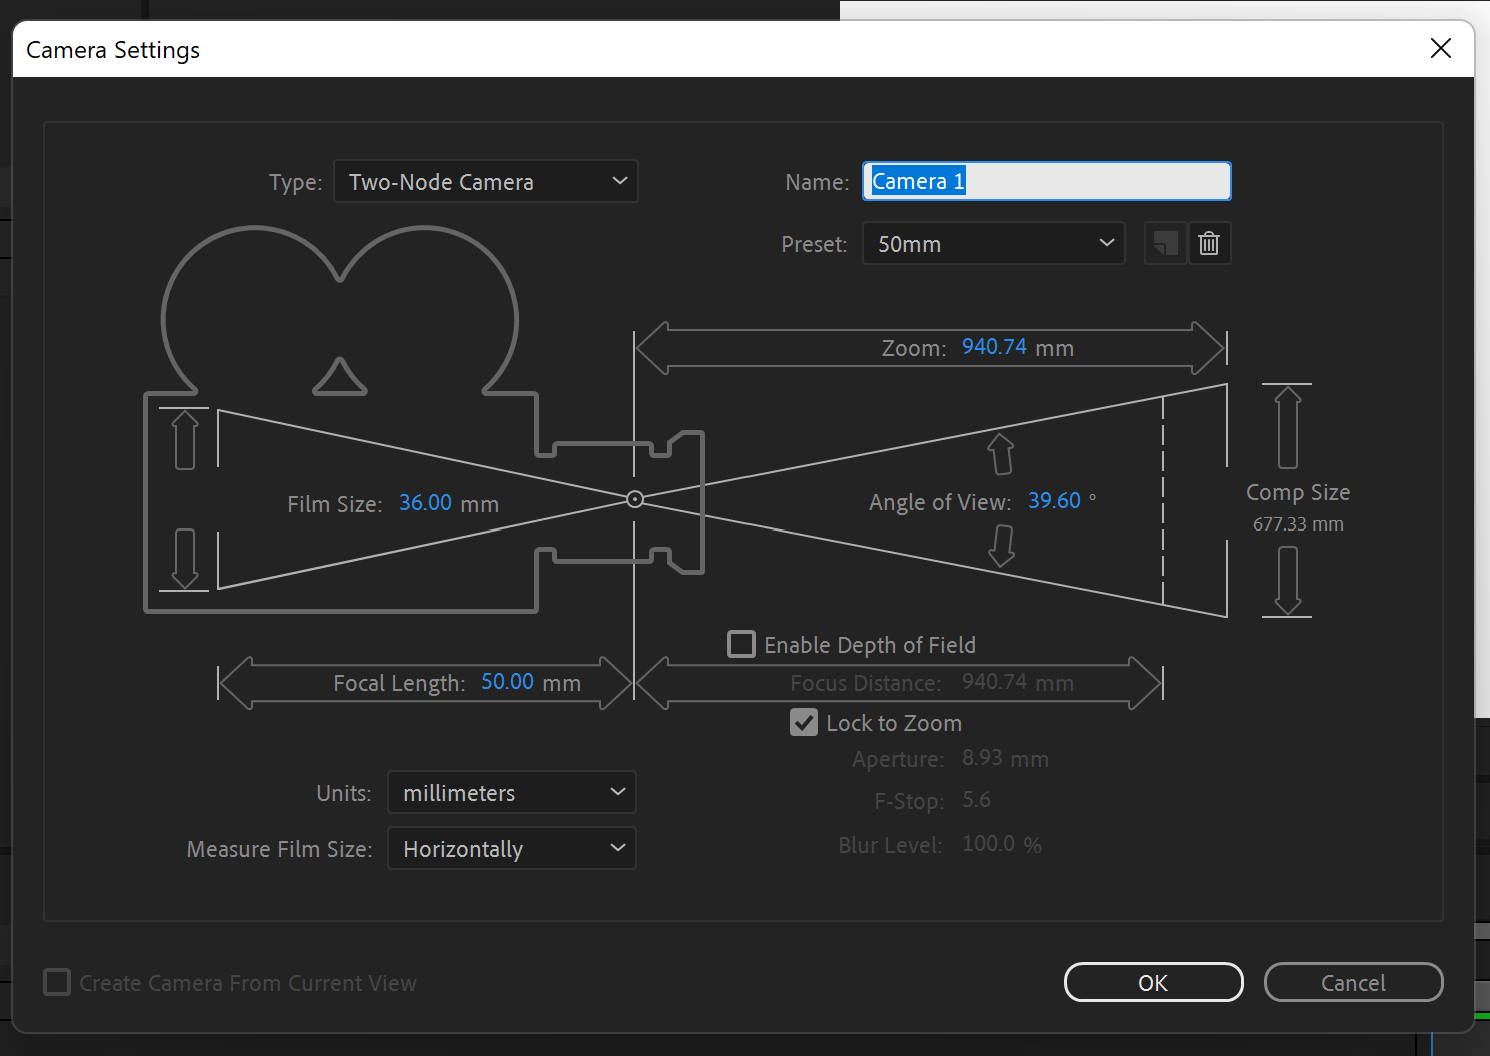
A dialog will appear with camera settings. Don’t be intimidated by this. We can change these later and don’t need to worry about all of them. Simply say okay.
You will now have a Camera in your scene. An important first step should be to parent your Camera to a Null (or later several linked Nulls). This is because the camera has what is called a “point of interest” that it will rotate towards when moved. This may be a thing you want but is often counter intuitive. We will simply move the Null instead of the camera. Next, you’ll want to make the Null (and any subsequent layers we create) 3D. We make a layer 3D by selecting the box under the cube next to our layer.

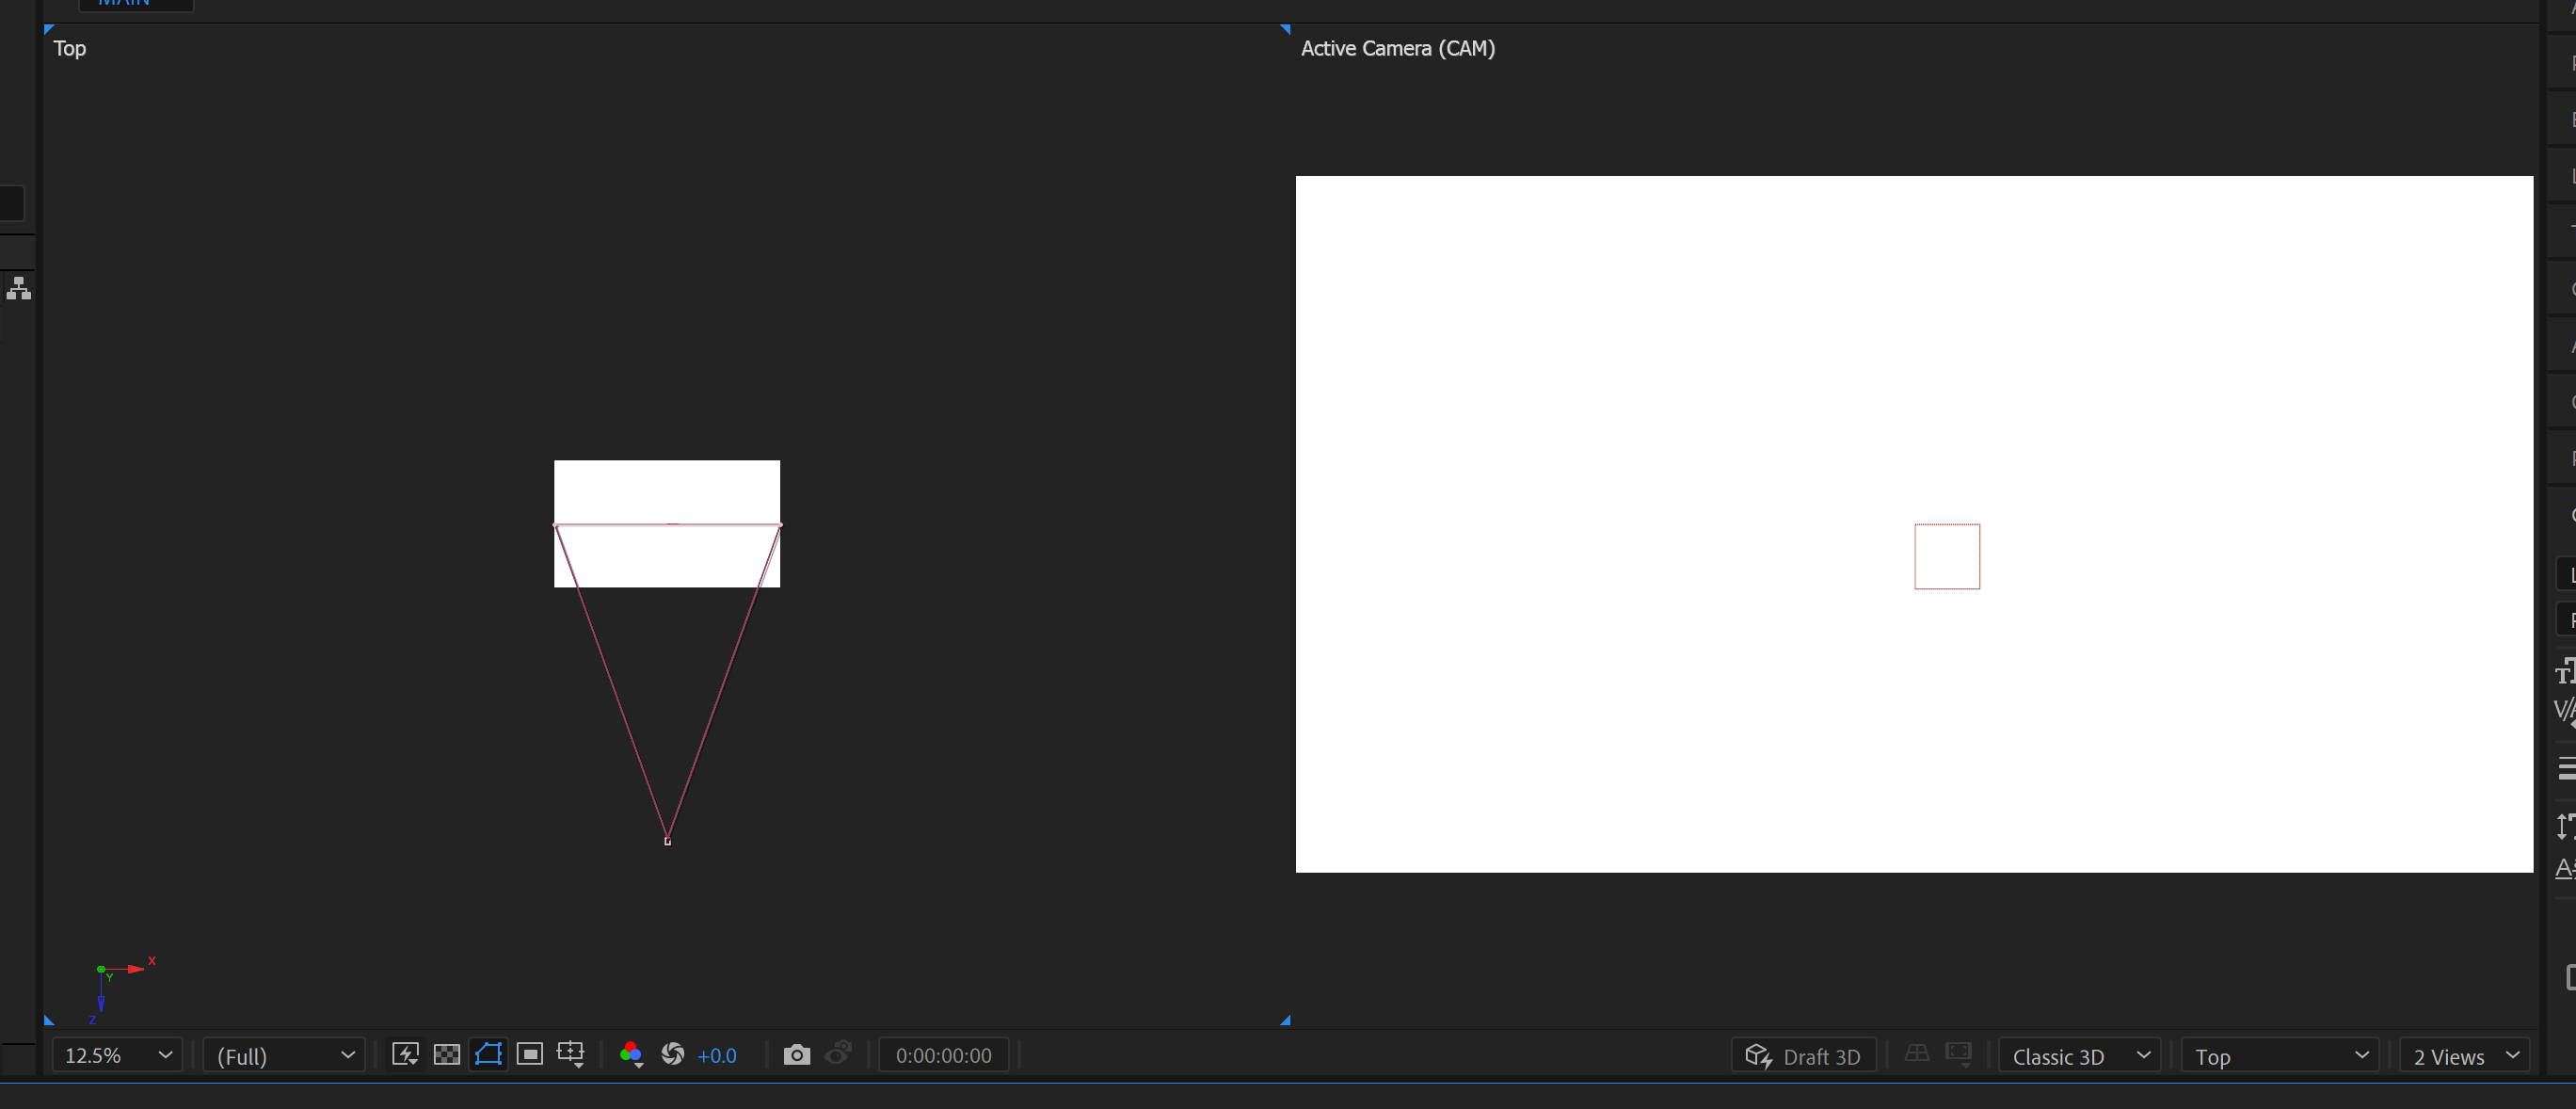
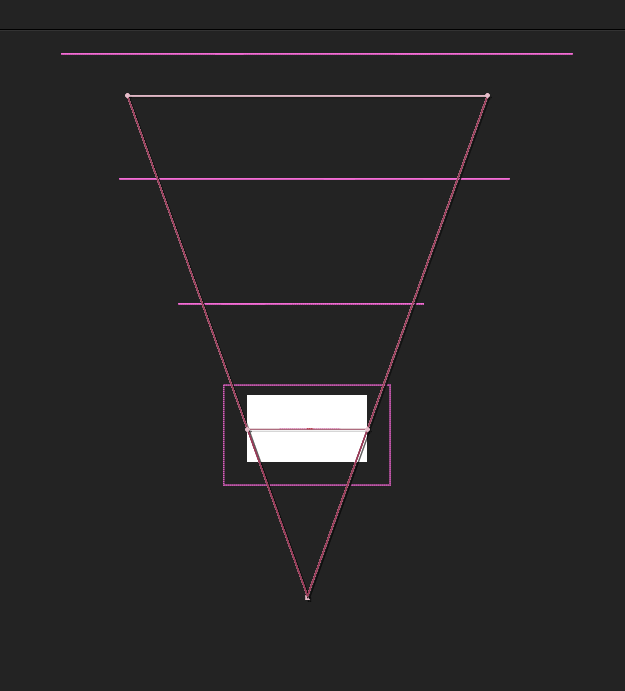
Next, it is important to see where the camera actually is in space, since it is not a physical object. To do this we create another “view” (see the bottom right of your preview area). We want to make sure one of our views is “top” This is helpful as we can see the range of what the camera can view as a triangle.
(Note! make sure your other view is set to “Active Camera” or the name of the camera you created so that you can actually see from the camera’s viewpoint
Now we can add our content.
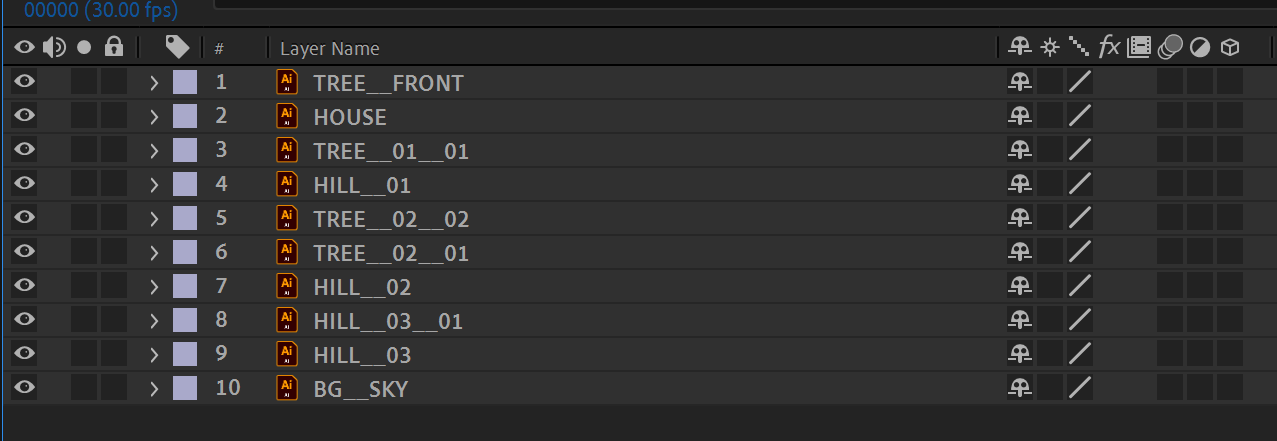
These are the layers in our scene with hills. It has been separated clearly in Illustrator so we can work with the layers easily.
I’ve precomposed related layers (ie trees + hill) and then made themthree dimensional.
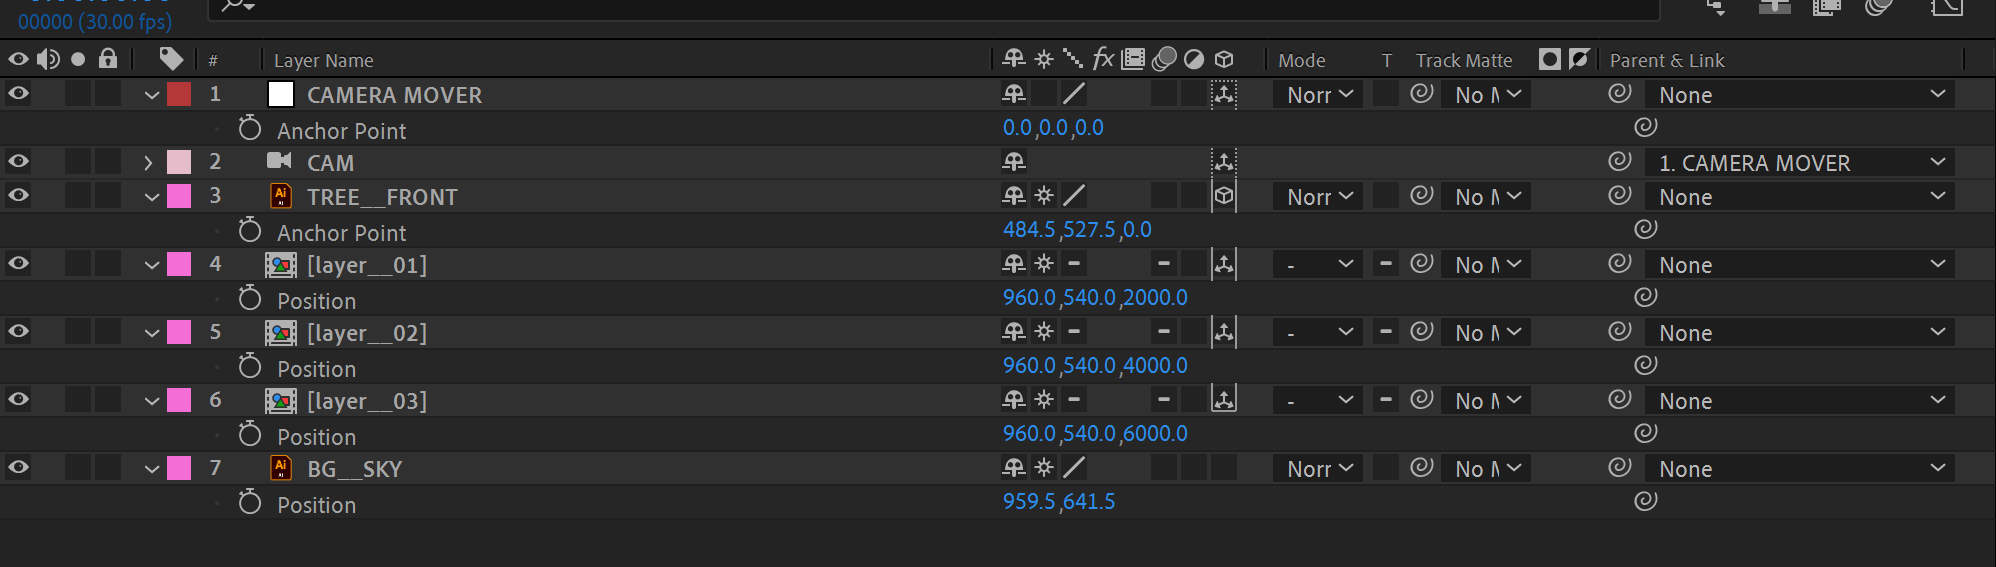
I’ve also turned on Continuous Rasterization (the switch that looks like a little gear or sun). This allows us to zoom into our scene without losing fidelity in our vector (if you are using raster imagery you’ll either have to make it big enough or construct multiple versions. What you need to know here is that this switch serves multiple functions, it also Collapses Transformations. This becomes important as our layers will not be 3D in our compositions, so we must remember to turn this functionality on in each layer inside our precomps!
After that, we have to actually arrange our layers in 3D space. You can see below, in our “top” view that the layers are moved back in space, and then are rescaled to fit within our window. I choose a relatively big number so there is some room to create depth. In this case I moved each subsequent layer backwards 2000 pixels in space. I then had to rescale them to fit within our window (or the “cone” of the camera’s view).
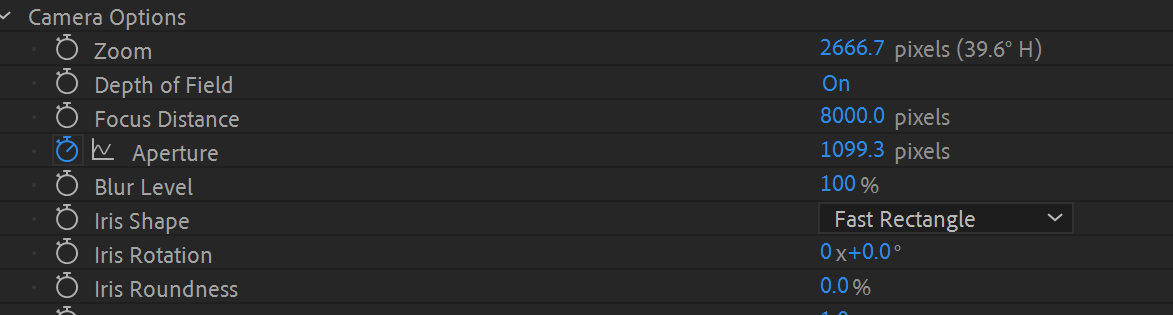
Depth of Field
Cameras in AE also have what is called depth of field. This can give us a blur for distant objects. How you achieve this is to:- open or twirl down the camera’s settings
-
turn on depth of field
-
increase our aperature size to increase the amount of blur
-
decrease the focus distance to create a shallower area of focus (in this case our object is roughly 8000px away so I have set the focus distance to that)
Below are my camera settings for this scene, as the camera moves forward I decrease the aperture to zero so that our house ends up fully infocus. You could also decrease the focus distance if you wanted.
AE Exercise #5
Recreate the camera move shown in this tutorial. Upload this for next week (4/11/202Related Material
Working with Cameras in After Effects (School of Motion tutorial/article)︎︎Back DMD 2