Warm-Up no.04, IF && LOGIC
What (is an) if (statement)?
Okay so, up to now we have not made any code that is actually INTERACTIVE In
to make our code interactive, we need do the following:
- detect a certain condition (a button or sensor being pressed or changed)
- respond to that condition (provide feedback with lights or sound)
Here's a simple example of how we can use the "A" button in order to turn all the pixels on.
"""
TURNIN' ON ALL THE PIXELS!
This code just turns all the pixels when
you press the button.
"""
from adafruit_circuitplayground import cp
import time

cp.pixels.brightness = 0.1;

while True:

    # everything after the colon is
    # what happens when the button is "true"
    # or pressed.

    # everything indented is what will
    # actually happen
    if cp.button_a is True:
        cp.pixels.fill((255,255,255))
This is what a nerd would call "conditional logic" That is to say, we check for certain condition or situation, and use logic to be very specific about what that condition is.
In this case we use what is called an if statement. Basically, it just says:
If the stuff after if and before the colon is true, or actually happening, then respond with the code after this.
The buttons on the Circuit Playground Express work in such a way that when you press them they will evaluate to "True" and when they are not pressed, they will evaulate to "False." You must use True or False capitalized like this.
Checking if something is true is so common in programming, that you can actually write it like this without "is True" and it will still work, python will assume you're looking to detect "is True":
"""
TURNIN' ON ALL THE PIXELS!
(a little simpler this time)
"""
from adafruit_circuitplayground import cp
import time

cp.pixels.brightness = 0.1;

while True:
    # this will work the same way
    # as the previous example:
    if cp.button_a:
        cp.pixels.fill((255,255,255))
What else tho?
You may have noticed, that with the previous examples, the lights just turned on and stayed on, we need to add extra logic in order for the button to turn off when we let go of the button. The easiest way to do this is to use else.
This must be at some point after an if block of code. It basically is akin to saying something like:
if the above stuff isn't happening, do this instead.
Here's how we can now get the button to respond when we let go:
"""
BUTTON A ON and OFF!
(like the previous examples,
except the button responds to
letting go/releasing)
"""
from adafruit_circuitplayground import cp
import time

cp.pixels.brightness = 0.1

# OUR MAIN LOOP
while True:

    # DETECT IF WE PRESSED THE BUTTON
    if cp.button_a:
        cp.pixels.fill((255,255,255))
    # If we let go of the button,
    # it will now be "false"
    # thus this code will
    # be triggered
    else:
        cp.pixels.fill((0, 0, 0))
...AND THEN?!?!
Often we want to check multiple conditions at once. In the example below we want to check both buttons at the same time. In real life we do this all the time:
- are we in the right place (school) on the right day (Monday), at the right time (when class starts)?
- are we at the train station, at the right track, at the right time?
- are we on the right operating system, with the right file type?
In order to link multiple conditional checks we both want to be true we would use the word and and to check multiple conditions in a row we need the term elif which means "else, if" as shown below:
# imports
from adafruit_circuitplayground import cp
import time

# some variables to make things a little clearer
red   = (255,0,0)
blue  = (0,0,255)
pink  = (255,0,255)
off   = (0,0,0)

# main loop
while True:
  # we check if we are pressing A but not B (red)
  if cp.button_a is True and cp.button_b is False:
    cp.pixels.fill(red)
  # check if we are pressing B and not A (blue)
  elif cp.button_a is False and cp.button_b is True:
    cp.pixels.fill(blue)
  # check if we are pressing both A & B (pink)
  elif cp.button_a is True and cp.button_b is True:
    cp.pixels.fill(pink)
  # otherwise (pressing neither, turn 'em off)
  else:
    cp.pixels.fill(off)
Note that you may see code that looks like the next example. This will produce the same result as the previous example, just with a different syntax. I'm letting you know this as it may appear in other code you see (from me, or other examples).
not saying "is True" is so common that you can use the not keyword. This is like saying if something is the "opposite" condition.
# imports
from adafruit_circuitplayground import cp
import time

#some vars for convenience
red = (255,0,0)
blue = (0,0,255)
pink = (255,0,255)
off = (0,0,0)

# DAT LOOP
while True:
  # if we are pressing A and not B
  if cp.button_a and not cp.button_b:
    cp.pixels.fill(red)

  # if we are pressing B and not A
  elif not cp.button_a and cp.button_b:
    cp.pixels.fill(blue)

  # if we are pressing both
  elif cp.button_a and cp.button_b:
    cp.pixels.fill(pink)

  # if we are pressing neither
  elif not cp.button_a and not cp.button_b:
    cp.pixels.fill(off)
Switching things up!
You can also check the switch similarly to how you check the buttons. If you are holding the Circuit Playground Express with the USB connection down:
- The switch to the right is True
- The switch to the left is False
Here is an example that will do the following:
-
if the switch is on the right:
- button a makes pixels 0 - 4 light up red
- button b makes pixels 5 - 9 light up red
-
if the switch is on the left:
- button a makes pixels 0 - 4 light up blue
- button b makes pixels 5 - 9 light up blue
# imports
from adafruit_circuitplayground import cp
import time

blue  = (0, 0, 255)
red   = (255, 0, 0)
off   = (0, 0, 0)

while True:
    # switch is right, and button  a is pressed
    if cp.button_a is True and cp.switch is True:
        # for loop to light up 0 - 4
        for p in range(0, 5):
            cp.pixels[p] = red

    # switch is right, and button b is pressed
    elif cp.button_b is True and cp.switch is True:
        for p in range(5, 10):
            cp.pixels[p] = red

    # switch is left, and button a is pressed
    elif cp.button_a is True and cp.switch is False:
        for p in range(0, 5):
            cp.pixels[p] = blue

    # switch is left, and button b is pressed
    elif cp.button_b is True and cp.switch is False:
        for p in range(5, 10):
            cp.pixels[p] = blue
    # otherwise just show me nuthin
    else:
        cp.pixels.fill(off)
Nested if statements
This is the same example with the s
from adafruit_circuitplayground import cp
import time

while True:
    if cp.switch is True:

        if cp.button_a is True:
            for p in range(0, 5):
                cp.pixels[p] = (255,0, 0)
        elif cp.button_b is True:
            for p in range(5, 10):
                cp.pixels[p] = (255, 0, 0)
        else:
            cp.pixels.fill((0, 0, 0))
    else:
        if cp.button_a is True:
            for p in range(0, 5):
                cp.pixels[p] = (0, 0, 255)
        elif cp.button_b is True:
            for p in range(5, 10):
                cp.pixels[p] = (0, 0, 255)
        else:
            cp.pixels.fill((0, 0, 0))
Hittin' the pads
The Circuit Playground Express also has what are called capacitive touch pads. These function similar to how a touch screen works.
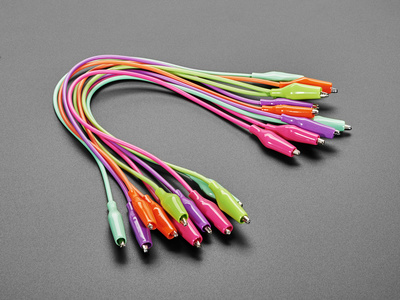
You can connect these pads to alligator clips, and then connect those to anything conductive:
- fruit
- your friend
- foil
- Play-Doh
they are labeled (on the board) as A1 - A7 (you can't use A0) it is what is called an "analog input"
You simply check if touch_A[the number of the pad to check] is true, see below:
"""
USIN' THE TOUCH PADS!
(Benjamin Santiago)

This is an example that uses the
capacative touchpads (A1 - A7)
and lights up a neopixel near it

Basically this is a diagnostic
example that you can modify.

"""
#importz z z z
#----------------------------------------------
from adafruit_circuitplayground import cp
import time

#dim the pixels a lililil
cp.pixels.brightness = 0.2

# MAIN LOOOO O O O O O P!
#----------------------------------------------
while True:
    if cp.touch_A3:
       cp.pixels[9] = (255,0,255)
    elif cp.touch_A2:
        cp.pixels[8] = (255,0,255)
    elif cp.touch_A1:
        cp.pixels[6] = (255,0,255)
    elif cp.touch_A7:
        cp.pixels[4] = (255, 0, 255)
    elif cp.touch_A6:
        cp.pixels[3] = (255, 0, 255)
    elif cp.touch_A5:
        cp.pixels[1] = (255, 0, 255)
    elif cp.touch_A4:
        cp.pixels[0] = (255, 0, 255)
    else:
        cp.pixels.fill((0,0,0))
#----------------------------------------------